v2rayNG
v2rayNG is a proxy software client under Android system, that is, Android mobile system, with powerful functions and supports multiple proxy protocols, such as VMess, VLESS, Shadowsocks, Socks, Trojan and other proxy protocols.
Not Recommended
Since v2rayNG doesn't support Jego's latest protocols, Jego doesn't recommend continued use. by 20250714
Please use Jego's recommended clients
 Get v2rayNG
Download Links:
https://github.com/2dust/v2rayNG/releases
https://play.google.com/store/apps/details?id=com.v2ray.ang
For beginners, it's recommended to download the stable version, which is the version marked as Latest after the version number.
Installation Tutorial
The installation tutorial is very simple. If it's downloaded through the app store, just download and install according to the prompts. If it's downloaded through the official website or other third parties, after downloading, you'll get a file named v2rayNG_x.x.x.apk, where the suffix .apk is the installation package for Android system, x.x.x represents the version number, then click install, very simple.
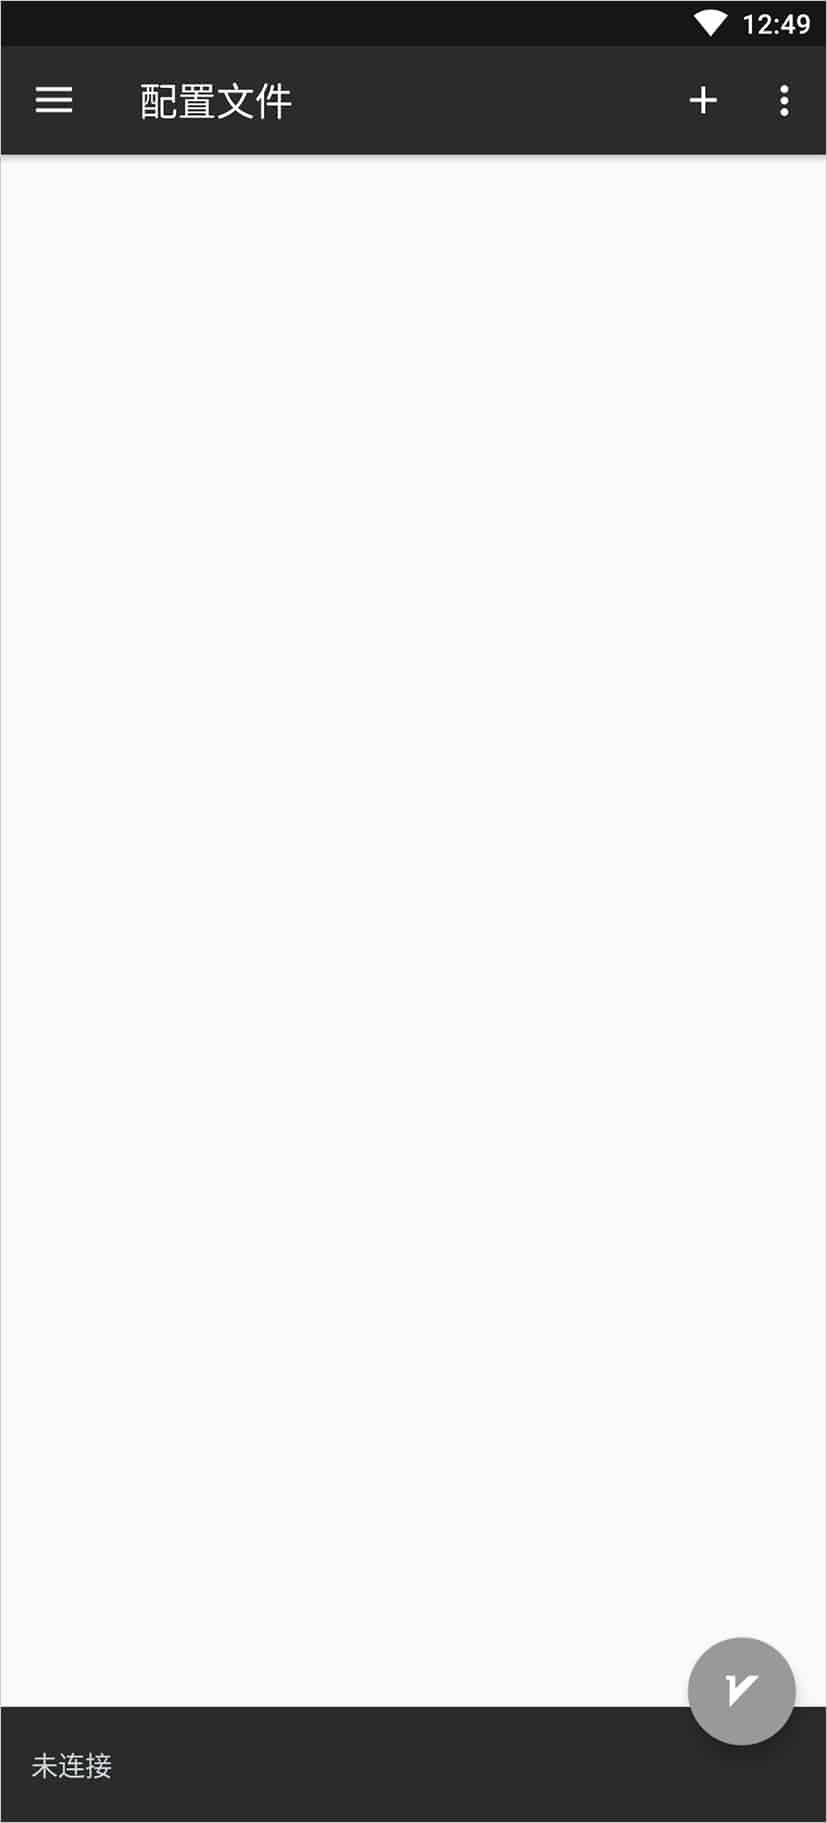
After installation, open the software and enter the main interface, which is the configuration file interface, as shown in the figure below.
Add Subscription:
In the Jego - Control Panel, click on Subscription Nodes in the left navigation bar, find the v2rayNG subscription address and click Copy.

Jego subscription service mobile panel: https://jego.us
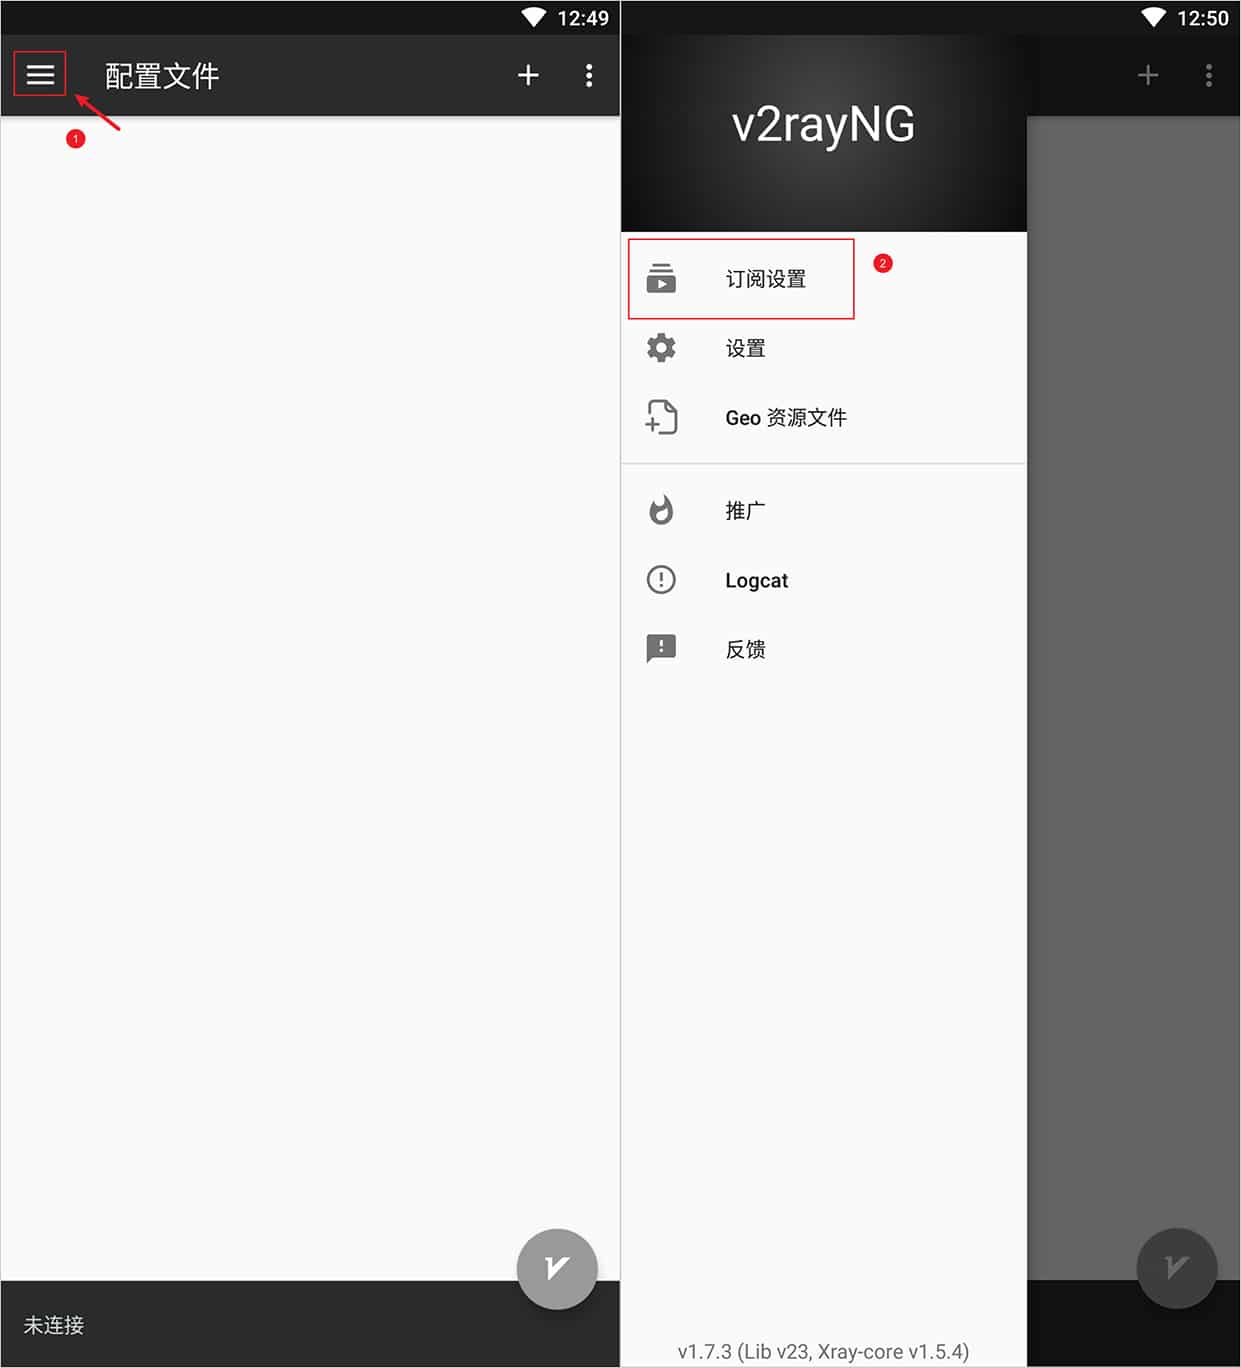
As shown in the figure below, click the three horizontal lines button in the upper left corner of the software main interface, enter the system settings interface in the popup window, then click subscription settings, as shown in the figure below.
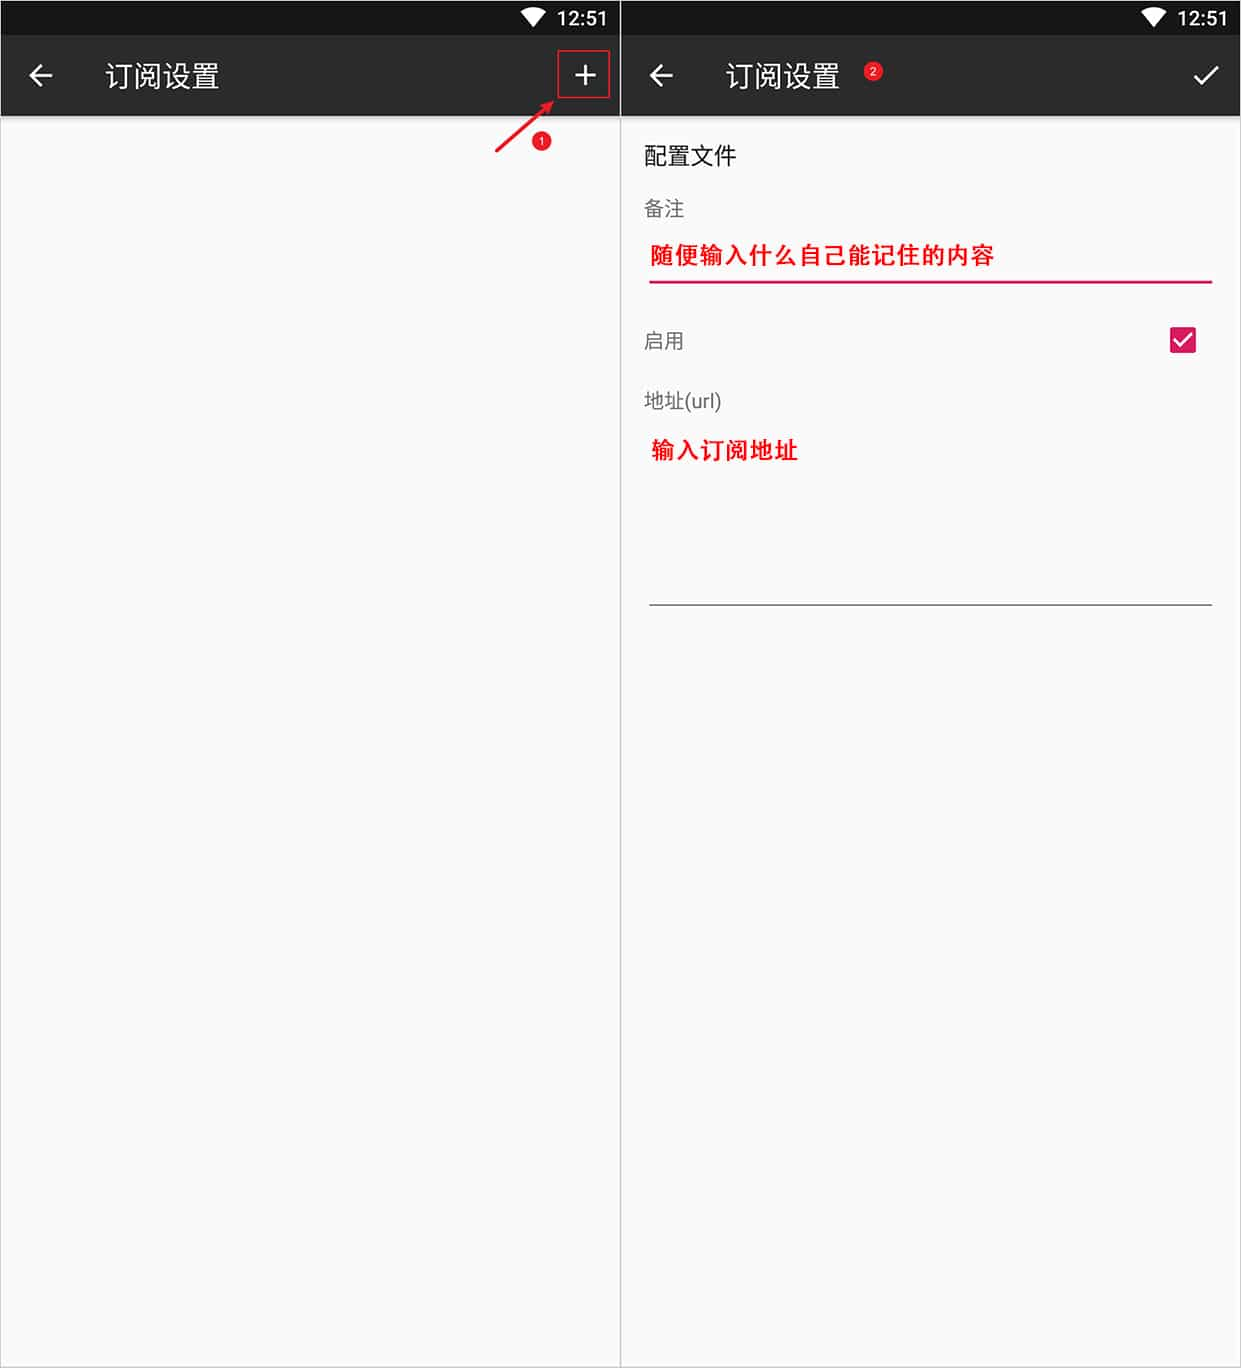
In the popup subscription settings main interface, click the ➕ button in the upper right corner to appear the add subscription interface. Enter content that you can distinguish this subscription node in the remarks, then enter the subscription address in the address (url), and finally click the ✔ button in the upper right corner to add the subscription address, as shown in the figure below.
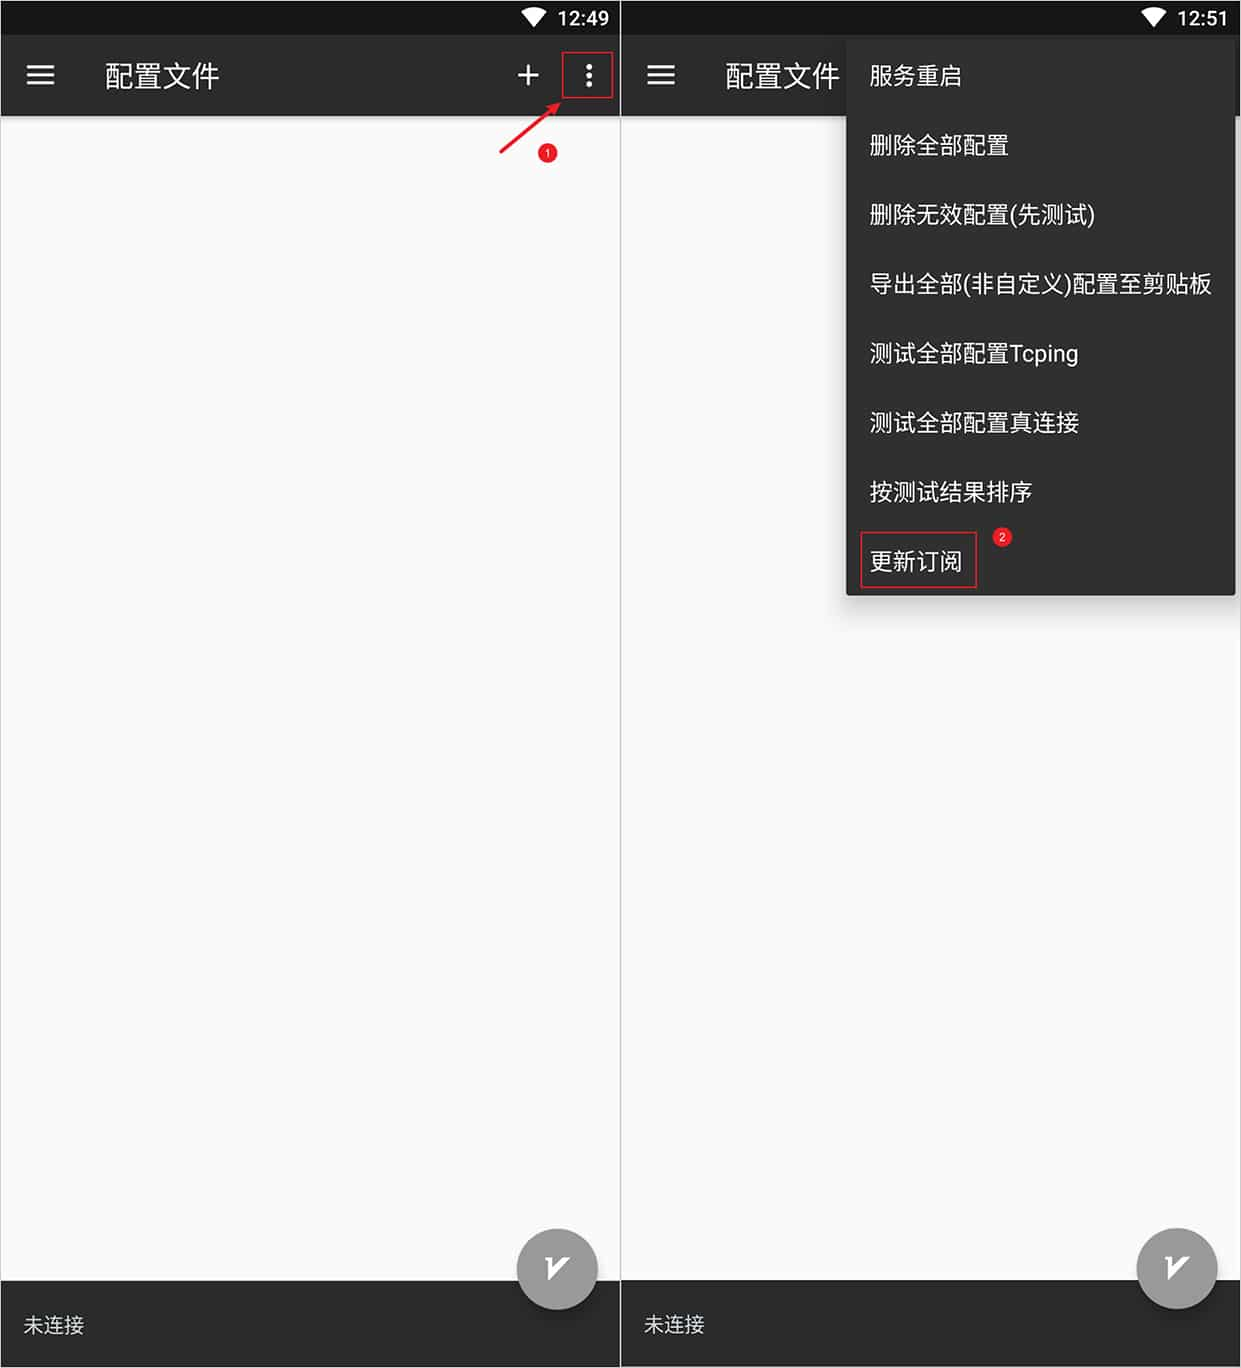
The last and most important step is to return to the software main interface, then click the three dots button in the upper right corner, select update subscription in the popup interface, as shown in the figure below.
At this point, adding proxy servers through subscription address method is successful.
Usage Tutorial
Proxy Server
In the main interface of the software, you can see all proxy servers added manually or through subscription settings, where the vertical bar on the far right of each proxy server represents the status of the selected server, where gray represents unselected, green represents selected.
All operations for each proxy server can be performed here. The three icons on the right represent share node server, edit node server, and delete node server respectively.
Start Proxy Server
Click the V icon in the bottom right corner of the software main interface to start the proxy. When first configured, it will prompt whether to create a proxy, that is, the network connection request in the software interface, click OK to start.
Switch Proxy Server
When there are multiple proxy servers, you just need to directly click on the proxy server you want to connect to to switch proxy servers. Whether in unconnected or connected state, you can switch.
Routing Settings
The principle of routing settings is to send incoming data to different outbound connections according to needs, thereby achieving on-demand proxy. A common usage of this function is to route domestic and foreign traffic, which can judge traffic from different regions through internal mechanisms, and then send them to different outbound proxies. In v2rayNG, there are three routing configurations that can be set: domain strategy, custom rules, and predefined rules.
Domain Strategy
In the domain strategy, the system has three built-in domain strategies to choose from.
- Asls
- IPIfNonMatch
- IPOnDemand
Choose the appropriate domain strategy according to different needs, generally default is fine.
Custom Rules
In custom rules, you can set websites or IPs that need proxy, direct connection websites or IPs, blocked websites or IPs through customization, thereby achieving personalized proxy needs.
Predefined Rules
Recommended for beginners, in predefined rules, the system has built-in different routing rules.
- Global proxy
- Bypass LAN addresses then proxy
- Bypass mainland addresses then proxy
- Bypass LAN and mainland addresses then proxy
- Global direct connection
Choose the appropriate predefined rules according to different needs, generally choose Bypass LAN and mainland addresses then proxy.