
How to Install
Jego is designed for Chrome and Microsoft Edge. Installing it from the browser's official extension store is the simplest path. Fingerprint (anti-detect) browser profiles that use a Chromium/Chrome engine can usually install it through a Chrome extension entry as well. This page also keeps the manual installation steps for times when the store is temporarily unavailable.
Check the version before installation
Use Update the extension to find the current official release entry. Keeping the browser and Jego up to date provides the latest improvements and fixes. Actual connection results can still vary by region and destination.
Go to the steps for your browser
Install Jego in Microsoft Edge
Update Edge to the latest version before starting.
Install from Microsoft Edge Add-ons
- Open the Jego page in Microsoft Edge Add-ons.
- Select Get in the upper-right corner and follow the browser prompts.
- Edge may then say that the extension controls proxy settings. Check the extension name, source, and permissions. After confirming that it is Jego, follow the browser prompt to keep the change.
Install manually when the store is unavailable
Microsoft Edge Add-ons remains the preferred source. For manual installation, download the ZIP package from the official Jego site, extract it, find the CRX file, and then follow these steps:
- Download the ZIP package from the official Jego site, extract it, and locate the
.crxfile inside. - Enter
edge://extensions/in the Edge address bar to open Manage Extensions. - Turn on Developer mode.
- Drag the
.crxfile from Finder or File Explorer onto the Edge extensions page. - When the installation prompt appears, confirm that the extension name is Jego, and then select Add extension.
- After installation, make sure that Jego appears in the extension list and is enabled.
The video below shows how to enable Developer mode in Edge, drag in the CRX file, and finish installation:
Pin the Jego icon
Pin Jego to the Edge toolbar so you can open it directly from the upper-right corner.
- Open Edge and select the menu button in the upper-right corner (three horizontal dots).
- Open Extensions → Manage Extensions.
- Find Jego and make sure that it is enabled.
- Select the Extensions icon to the right of the address bar to open the extension list.
- Select the pin icon beside Jego to pin it to the toolbar.
- When the Jego icon appears beside the address bar, you can select it whenever you want to use the extension.
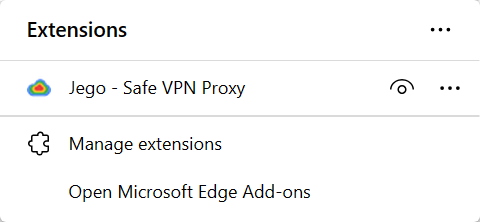
Once installed, you can register an account, then follow Start using Jego to sign in and pick a mode and node.
Install Jego in Google Chrome
Update Chrome to the latest version before starting.
Install from Chrome Web Store
- Open the Jego page in Chrome Web Store.
- Select Add to Chrome in the upper-right corner and follow the browser prompts.
Install manually when the store is unavailable
Chrome Web Store remains the preferred source. For manual installation, download the ZIP package from the official Jego site, extract it, find the CRX file, and then follow these steps:
- Download the ZIP package from the official Jego site, extract it, and locate the
.crxfile inside. - Enter
chrome://extensions/in the Chrome address bar to open Manage Extensions. - Turn on Developer mode.
- Drag the
.crxfile from Finder or File Explorer onto the Chrome extensions page. - When the installation prompt appears, confirm that the extension name is Jego, and then select Add extension.
- After installation, make sure that Jego appears in the extension list and is enabled.
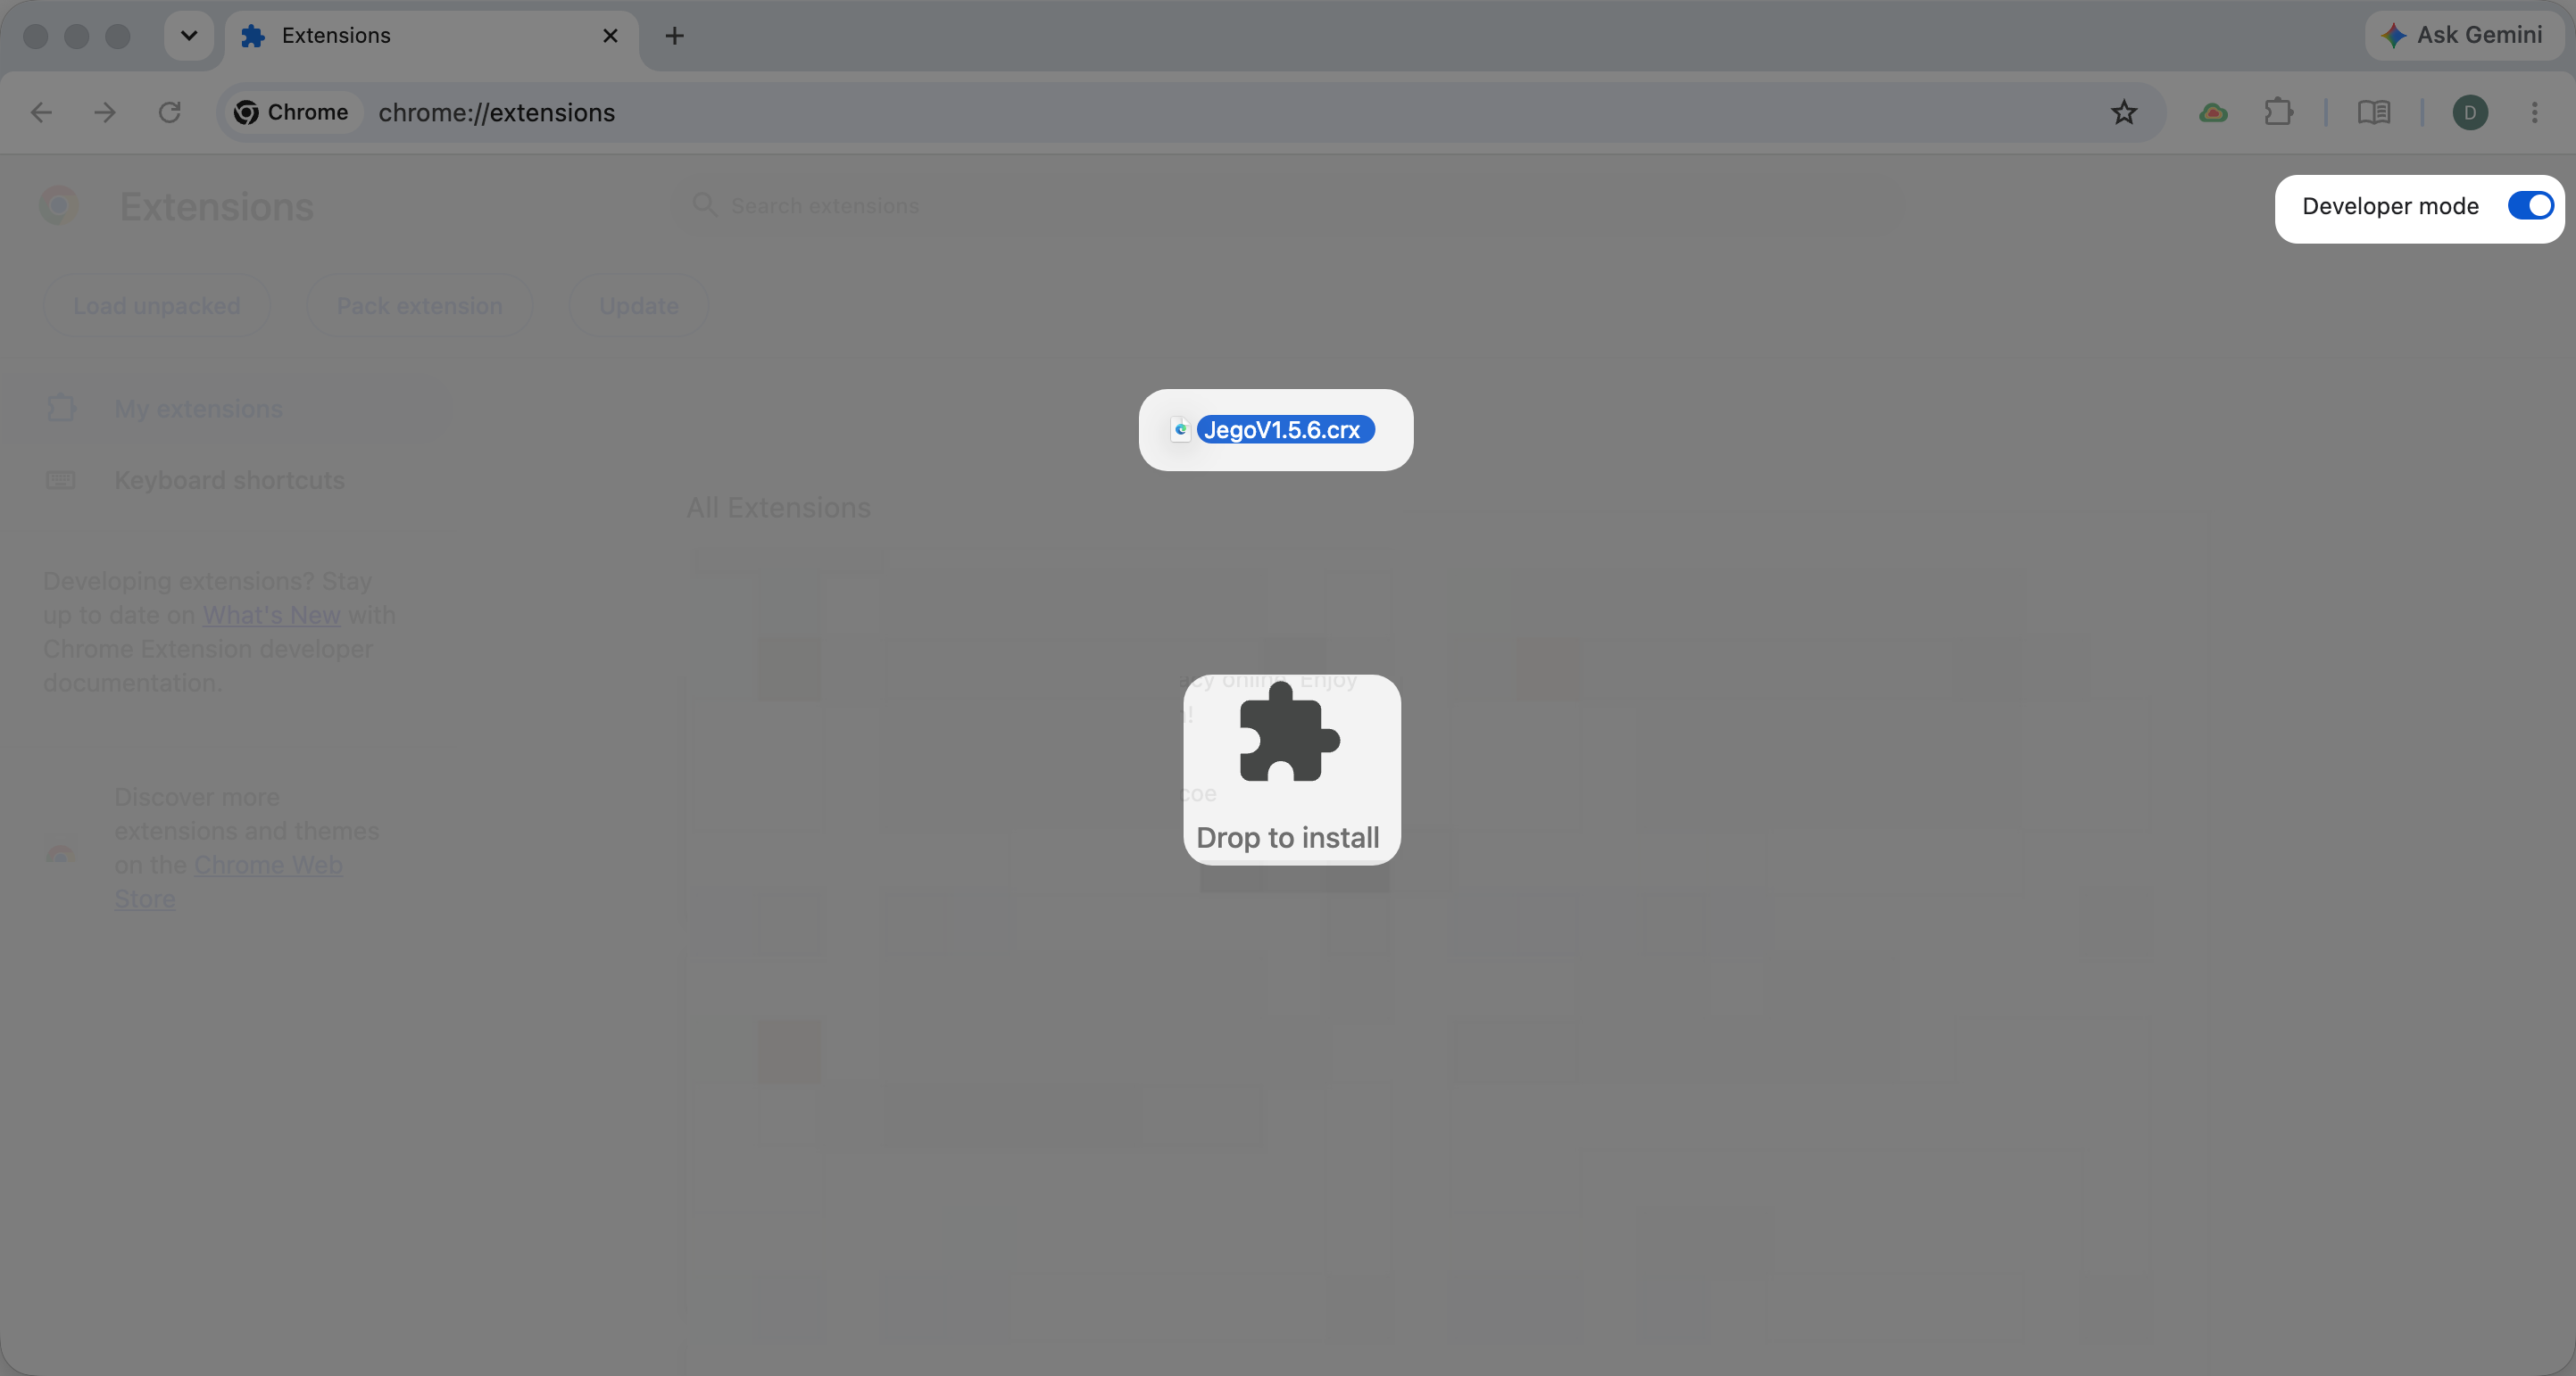
The image below shows where to drag the CRX file on the Chrome extensions page:
Pin the Jego icon
Pin Jego to the Chrome toolbar so you can open it directly from the upper-right corner.
- Open Chrome and select the menu button in the upper-right corner (three vertical dots).
- Open Extensions → Manage Extensions.
- Find Jego and make sure that it is enabled.
- Select the Extensions icon to the right of the address bar to open the extension list.
- Select the pin icon beside Jego so that it appears selected in blue.
- When the Jego icon appears beside the address bar, you can select it whenever you want to use the extension.
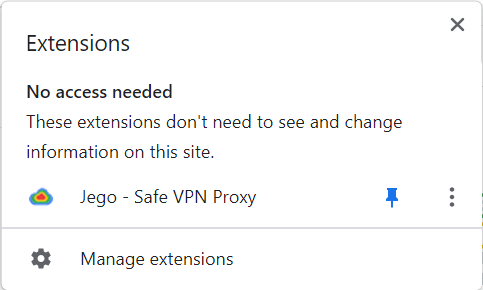
Next, register an account, then follow Start using Jego to sign in and choose a mode and node.
Install in other Chromium browsers
Compatibility note
QQ Browser, 360 Browser, and fingerprint (anti-detect) browsers can usually install Jego when they support Chrome extensions. Update the browser to its current stable version first. This guide does not apply to Firefox profiles, cloud phones, or mobile environments.
Fingerprint (anti-detect) browsers
Fingerprint browsers normally keep each account in a separate browser profile. You only need to install Jego in the profile where you plan to use it.
- Create or select the profile where you want to use Jego. If you can choose a browser type, choose Chrome or Chromium.
- In the fingerprint browser or profile settings, open Extensions, Extension center, or the equivalent area.
- Select Add Chrome Web Store extension, paste the Jego Chrome Web Store link, then choose the profile and enable Jego. If there is no such entry, launch the profile, open the same link inside it, and select Add to Chrome.
- Save, then fully close and reopen the profile. When the Jego icon appears, select it, sign in, and choose a mode and node. The installation is now complete.
Menu names vary by product. See the official extension guides for AdsPower, BitBrowser, GoLogin, and Multilogin.
If Jego is missing or cannot connect
- Jego does not appear: Return to Extensions, make sure Jego is assigned to the current profile and enabled, then reopen the profile.
- Jego is installed but cannot connect: Disable other proxy or VPN extensions in the profile. If the fingerprint browser also has a separate profile proxy, change it to direct or off and try again.
- There is no Chrome Web Store entry: If the browser explicitly supports
.crximports, download the current ZIP package from the official Jego site, extract it, and use the included.crx. Do not download or convert Jego through a third-party site. If the browser does not accept the format, follow its official extension guide or contact its support team.
After connecting, use Start using Jego to confirm the mode, node, and access status.
QQ Browser
Visit the official Jego site, download CRX package for Jego, and extract the ZIP file to obtain the
.crxfile.Open QQ Browser, select ≡ in the upper-right corner, then select Application Center.

- Select Manage My Applications, then turn on Developer Mode in the upper-right corner.

- If the current QQ Browser allows external CRX installation, drag the CRX from the official Jego site onto the extension page. Review the permissions and follow the page prompts to finish. If that version does not accept the file, use the extension entry provided by the browser.

360 Browser
Visit the official Jego site, download CRX package for Jego, and extract the ZIP file to obtain the
.crxfile.Open 360 Browser, select the icon with four colored squares in the upper-right corner, then select Manage.

- Select Advanced Management in the upper-right corner of the new page.

- Turn on Developer Mode in the upper-right corner.

- If the current 360 Browser allows external CRX installation, drag the CRX from the official Jego site onto the extension page. Review the permissions and follow the page prompts to finish. If that version does not accept the file, use the extension entry provided by the browser.

Use Jego in other computer or phone apps
The browser extension controls only the browser where Jego is installed. To use a proxy in other computer or phone apps, see How to Use Proxy on PC or Mobile.