v2rayN
v2rayN is a v2ray Windows client that is relatively friendly to beginners on PC platforms.
Not Recommended
Since v2rayN doesn't support Jego's latest protocols, Jego doesn't recommend continued use. by 20250714
Please use Jego's recommended clients
 Get v2rayN
v2rayN official website download address: https://github.com/2dust/v2rayN/releases
For beginners, it's recommended to download the stable version, which is the version marked as Latest after the version number.
Installation Tutorial
Software Directory
After downloading, find a suitable directory, it's recommended to install on a non-system drive, extract the compressed package, the directory after extraction is as shown in the figure below.
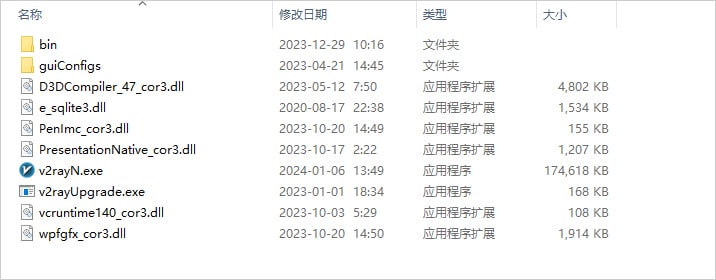
Find the main program v2rayN.exe and double-click the left mouse button to start using. After the program starts, it will minimize to the tray in the bottom right corner of the taskbar. Double-click the blue V small icon with the mouse to open the main interface of the software.
Add Subscription:
In the Jego - Control Panel, click on Subscription Nodes in the left navigation bar, find the v2rayN subscription address and click Copy.
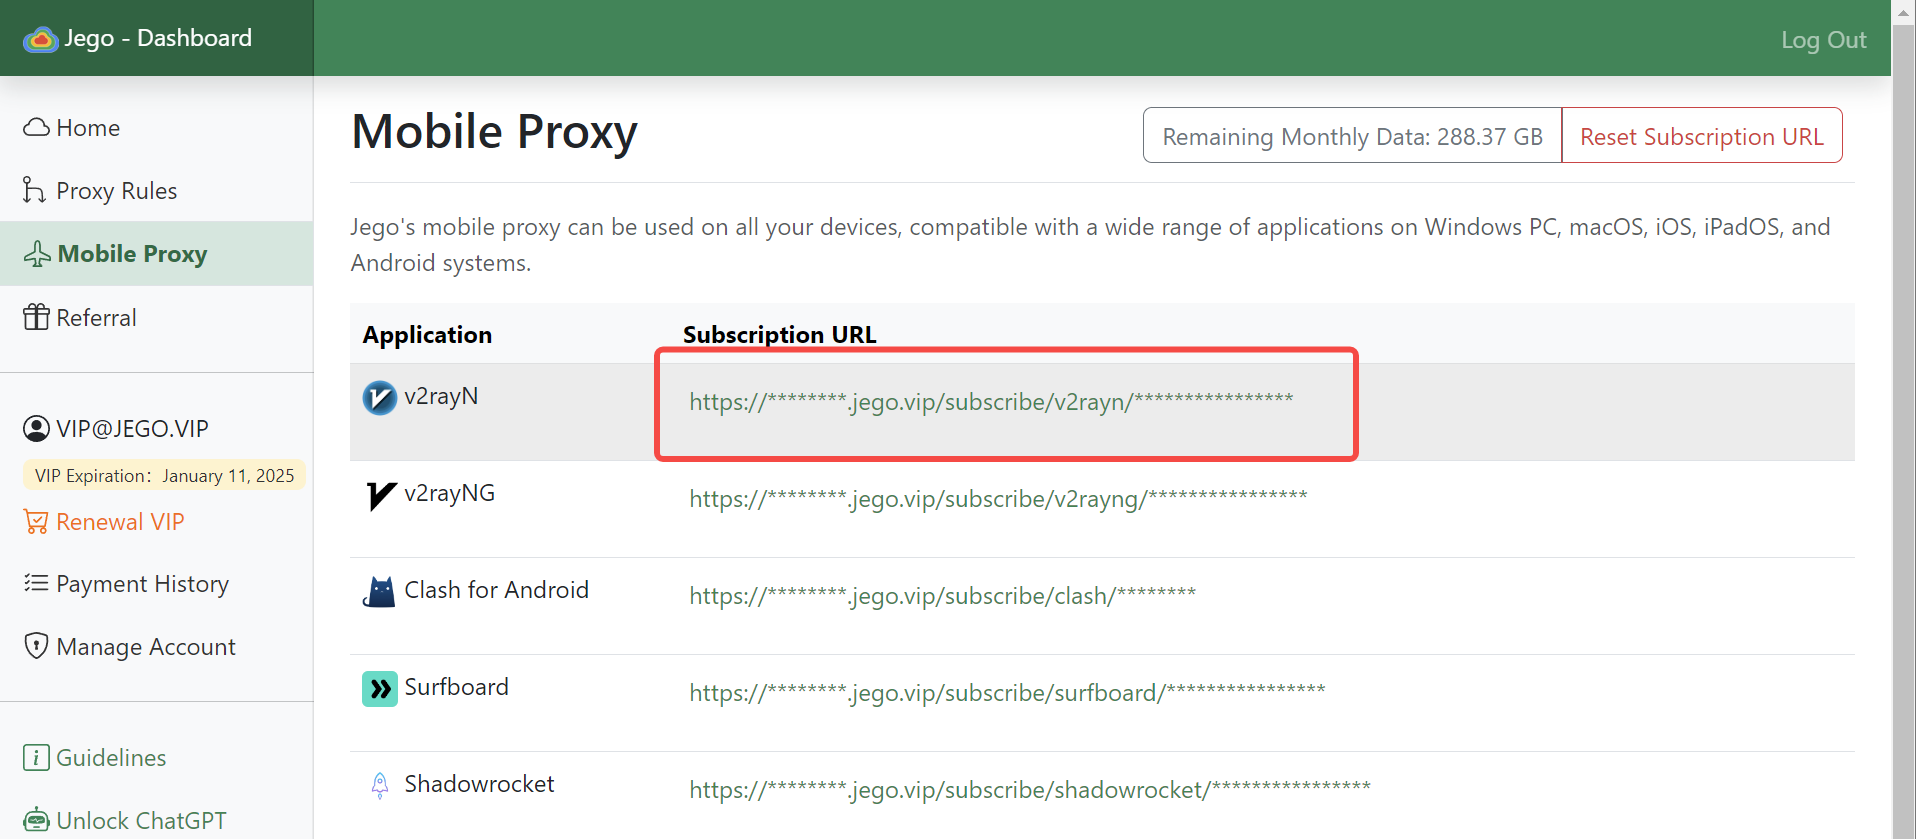
Jego subscription service mobile panel: https://jego.us
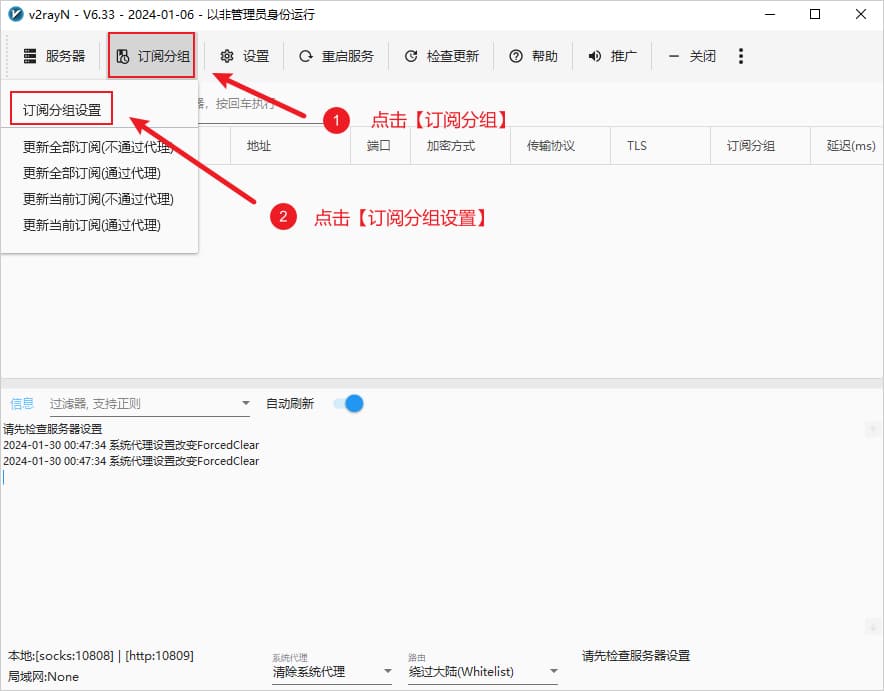
Click on Subscription Group in the software main interface, Click Subscription Group Settings, as shown in the figure below:
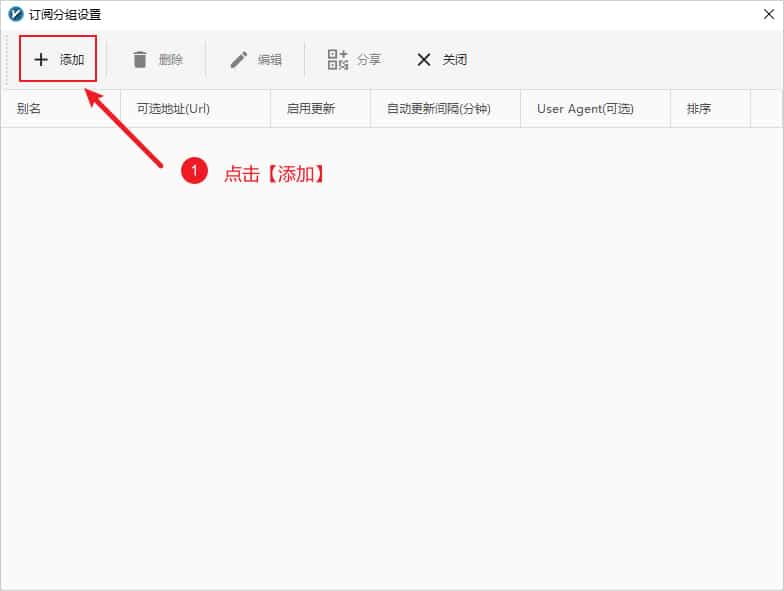
Click Add in the popup window, as shown in the figure below:
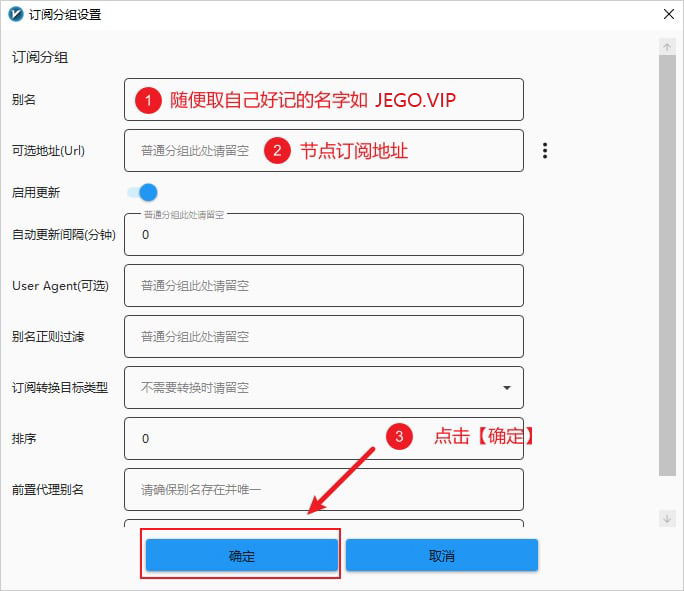
Then in the popup window, enter an alias, paste the subscription address in the Optional Address (Url) section, click Add, then click OK, as shown in the figure below:
After adding, click on Subscription Group in the software main interface, then click Update All Subscriptions (Without Proxy) to successfully use the subscription address to add node information, as shown in the figure below:

Usage Tutorial
After adding node information, enable system proxy and select routing mode, and you can start using proxy servers to access the internet, as described in the System Proxy and Routing Mode sections below.
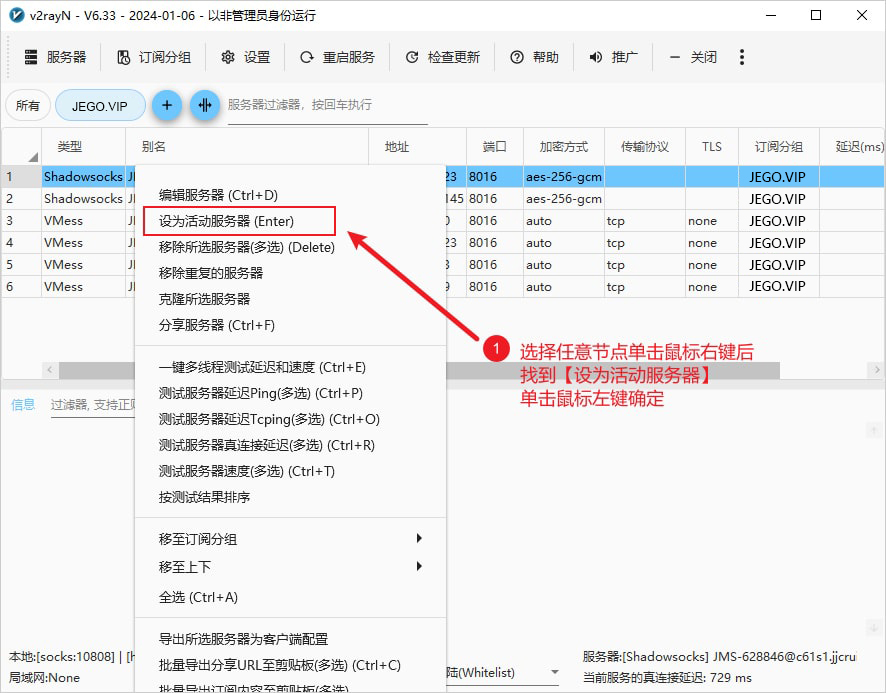
Select Node
In the software main interface, select any node, right-click the mouse, find Set as Active Server in the popup window to select the node, as shown in the figure below, then enable system proxy. You can also select any node and double-click the left mouse button to select the node.
System Proxy
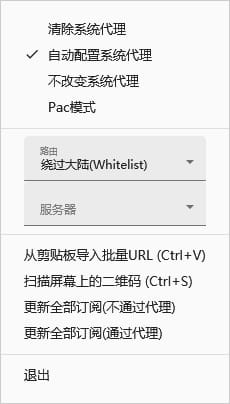
After configuring the server (node) according to the configuration tutorial above, you need to set the system proxy to enable the browser to support internet access function. Find the software icon in the system tray in the bottom right corner of the taskbar, right-click the mouse on the icon, click Auto Configure System Proxy, at this time the software icon will turn red, and you can start using it. Open Google to try if you can access it.
Routing Mode
The function of routing is to send incoming data to different outbound connections according to needs, to achieve on-demand proxy. A common usage of this function is to route domestic and foreign traffic, which can judge traffic from different regions through internal mechanisms, and then send them to different outbound proxies. There are three routing modes to choose from.
- Bypass Mainland (Whitelist) mode: That is, the whitelist in the original version, only websites in the whitelist access the internet through node server proxy
- Blacklist mode: Except for websites in the blacklist, all other websites access the internet through node server proxy
- Global mode: All websites access the internet through node server proxy
Choose the appropriate routing mode according to different needs, generally choose whitelist mode.

Icon Description
The icon color of the software is different in different states, refer to the icon color description in the table below.
| Icon | Software Status | Description |
|---|---|---|
| Clear System Proxy | Every time the service is started/restarted, forcibly clear the proxy of the windows system (ie). | |
| Auto Configure System Proxy | Every time the service is started/restarted, forcibly set the proxy of the windows system (ie). | |
| Don't Change System Proxy | Every time the service is started/restarted, do nothing. The function is to preserve the proxy set by other software. |
Common Issues
What's the difference between core types?
There are four core types in total: v2fly, SgerNet, Xray, sing-box. Generally, there's no difference in daily use, you can choose any one randomly.
What protocols are supported?
![]() VMess, VLESS, Trojan, Socks, Shadowsocks, Hysteria2, Tuic and other proxy protocols.
VMess, VLESS, Trojan, Socks, Shadowsocks, Hysteria2, Tuic and other proxy protocols.
Relationship with v2rayNG?
![]() The Android mobile version of v2rayN is called v2rayNG, you can go to v2rayNG to download and view detailed tutorials.
The Android mobile version of v2rayN is called v2rayNG, you can go to v2rayNG to download and view detailed tutorials.