
Jego extension popup
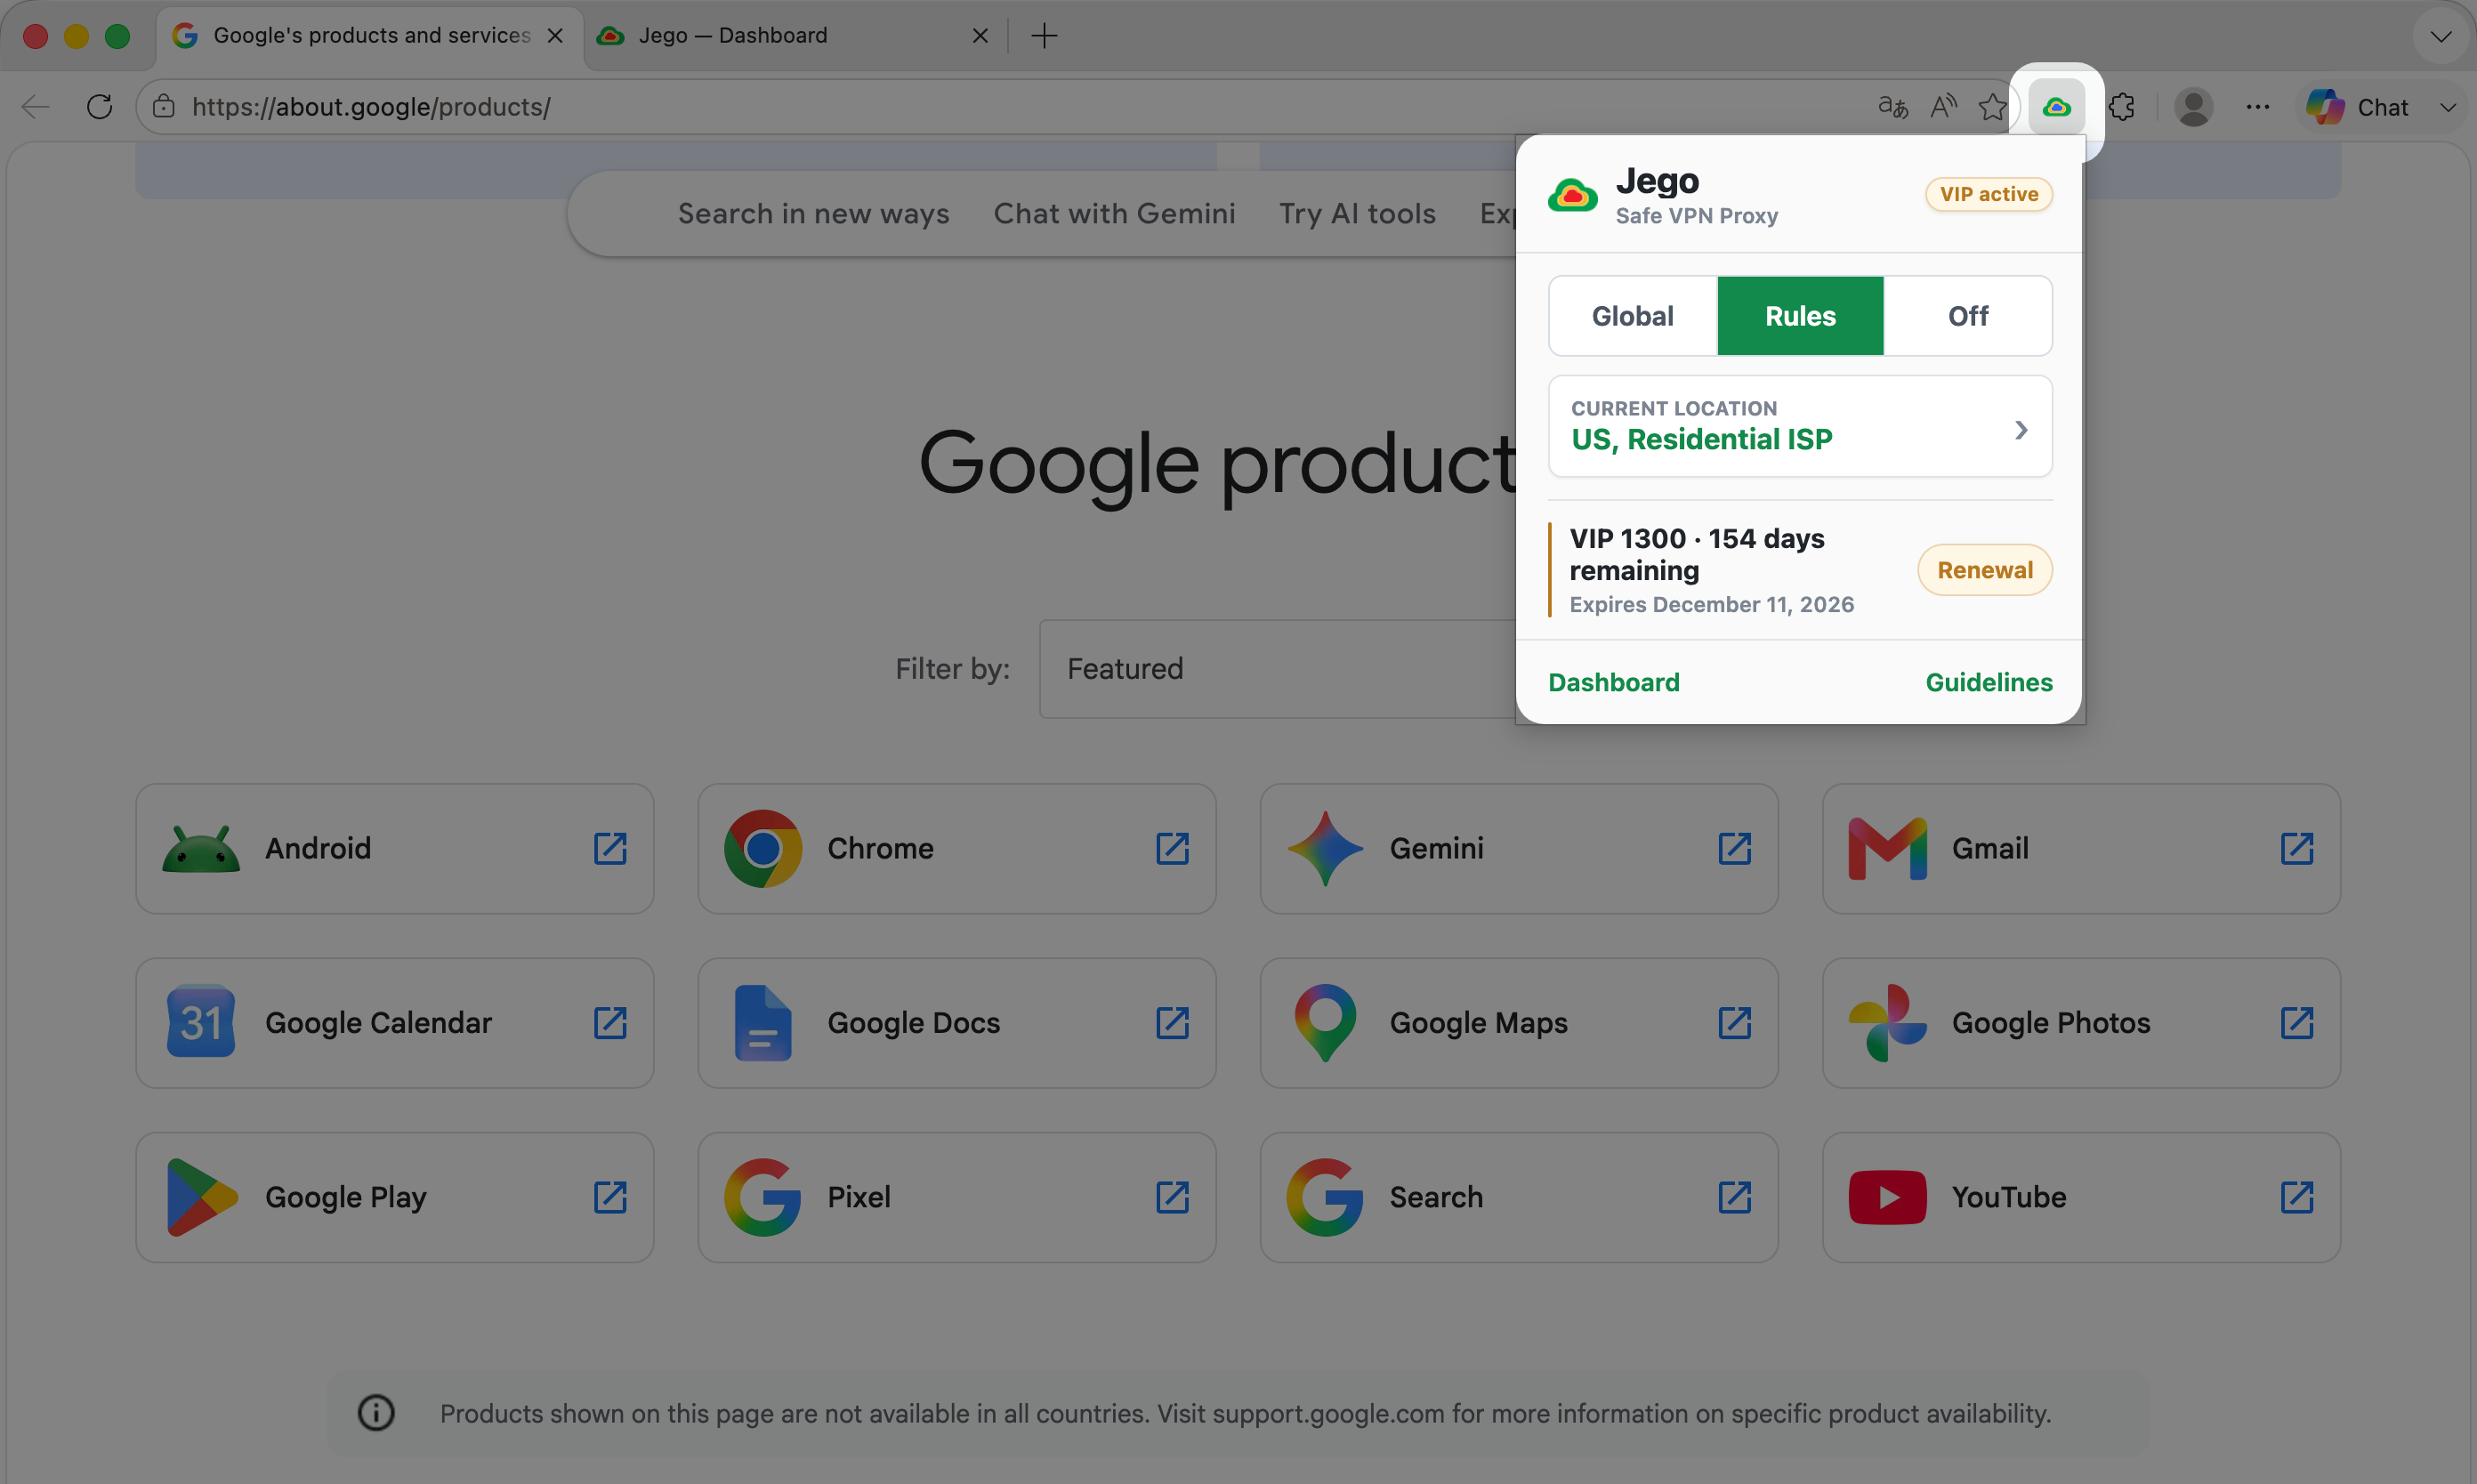
After installing Jego, click its icon in the top-right corner of Chrome or Edge. The popup shows the mode, current node, membership information, and common entries such as the Dashboard.
For the complete installation, sign-in, and first-use steps, see Start using Jego. This page only explains the areas inside the popup.
Mode controls
- Rules: Follows proxy rules for domains and IP addresses. Proxy requests use the selected node, while direct rules use the local connection.
- Global: All browser requests use the selected node, while local addresses still connect directly.
- Off: Jego stops accelerating the browser, which returns to your normal connection. The saved node is not used while Jego is off.
The member popup shows Rules / Global / Off; the Free popup shows Connect / Off — select Connect to start.
See How to choose a mode for more examples.
Current location
Current location shows the Jego route used by browser requests. Select this row to open the node list:
- Auto Select: Jego chooses the current route.
- Specific node: Select a region or route directly from the list.
- Off mode: The node list is disabled. Choose Rules or Global to select a node.
Read How to choose a node for detailed help.
Membership information and footer entries
When you are signed in, the popup shows Free, Trial, or VIP status. Member accounts also show the expiration date and upgrade or renewal actions.
The footer opens the Dashboard and Guidelines. To sign out, open the Dashboard and use the account menu.
The Dashboard shows the current mode and node, checks whether Google is reachable, manages proxy rules, and opens full network diagnostics. Membership, subscription, billing, and support items may vary by account.
Related guides
- A site will not open: Run Jego Diagnostics
- Send one domain through Jego: Custom proxy rules
- Keep the extension up to date: Update the extension
- Understand browser permissions: Permissions, privacy, and security